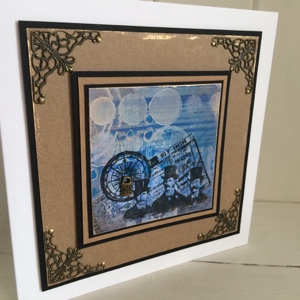
Hi folks, I just thought I would do a quick blog for my page today to show you how I come up with my master boards. I don't think that there are any hard and fast rules to this and everyone has their different ways of creating. I have made a step by step in photos to show how I built up the layers on this particular board.
Now for some dots using a Dylusions stencil, I love dots, circles, splodges all shapes and sizes, I love em!
See I told you I love circles! Using my chosen colours placing white over the darker areas and darker shades over the lighter areas.
Time for some stamping! Using stamps from the Tim Holtz set 'District Warehouse' I stamped in blue and white pigment ink.
I started off with white linen Dylusions paint and brayered onto my white card.
Using London blue and the brayer I repeated. It doesn't look much at the moment, I promise when you add more layers the magic begins!
Brayering again now with white.
A change of colour. Using after midnight.
Again I brayer over the darker blue to knock it back.
Time for some stencils, using white linen I sponged through the Dylusions stencils. I like to put my stencils in three different areas but that is dependant on size, style and pattern.
Now for some dots using a Dylusions stencil, I love dots, circles, splodges all shapes and sizes, I love em!
Now I've added in some stripes still working in three areas and placing my stencil in different directions.
See I told you I love circles! Using my chosen colours placing white over the darker areas and darker shades over the lighter areas.
Coming back with the White, using Tim Holtz splotches stencil. I broke my rule of three on this I love the effect the rough edged circles create over the darker colours.
Time for some stamping! Using stamps from the Tim Holtz set 'District Warehouse' I stamped in blue and white pigment ink.
So there you have it, my master board! Like I said there are no rules just go with what you feel and watch your piece grow!
Here are a couple of very different makes using this master board. The details and links to the materials I used are over at A Sprinkle of imagination.
Thanks for stopping by. I love to hear your comments, you can leave these below or maybe you would like to follow my blog for regular updates?
Happy crafting,
Hugs,
Clare X X X


FABULOUS! I love it
ReplyDeleteKathyk
Thank you for your comment Kathy, it takes. A long time to make a step by step. Your comment is very much appreciated X X X
ReplyDeleteI love this!!! Thank you for your inspiration to try this myself!!
ReplyDeleteThank you Marilyn. Thanks for visiting and good luck with your project X
DeleteOh, so gorgeous. I love the steps you did and how you incorporated stamps and ink with stencils and paints
ReplyDeleteWhat a great tutorial, must try this one the finished article looks fab x
ReplyDelete